Creating an AR experience with 3D Model content
After this tutorial you should know how to create an AR experience with a 3D model within heijar`s CMS.

Before the start – What to consider
„Gute Vorbereitung ist die halbe Miete!“ as we would say at our second office in Graz, Austria (“Good preparation is half the pie!”). If you haven`t read Tutorial 1 and Tutorial 2 yet, we would advice doing so before you continue with this tutorial, however, it`s of course your choice 😉
Start – Ready to go!
Setup
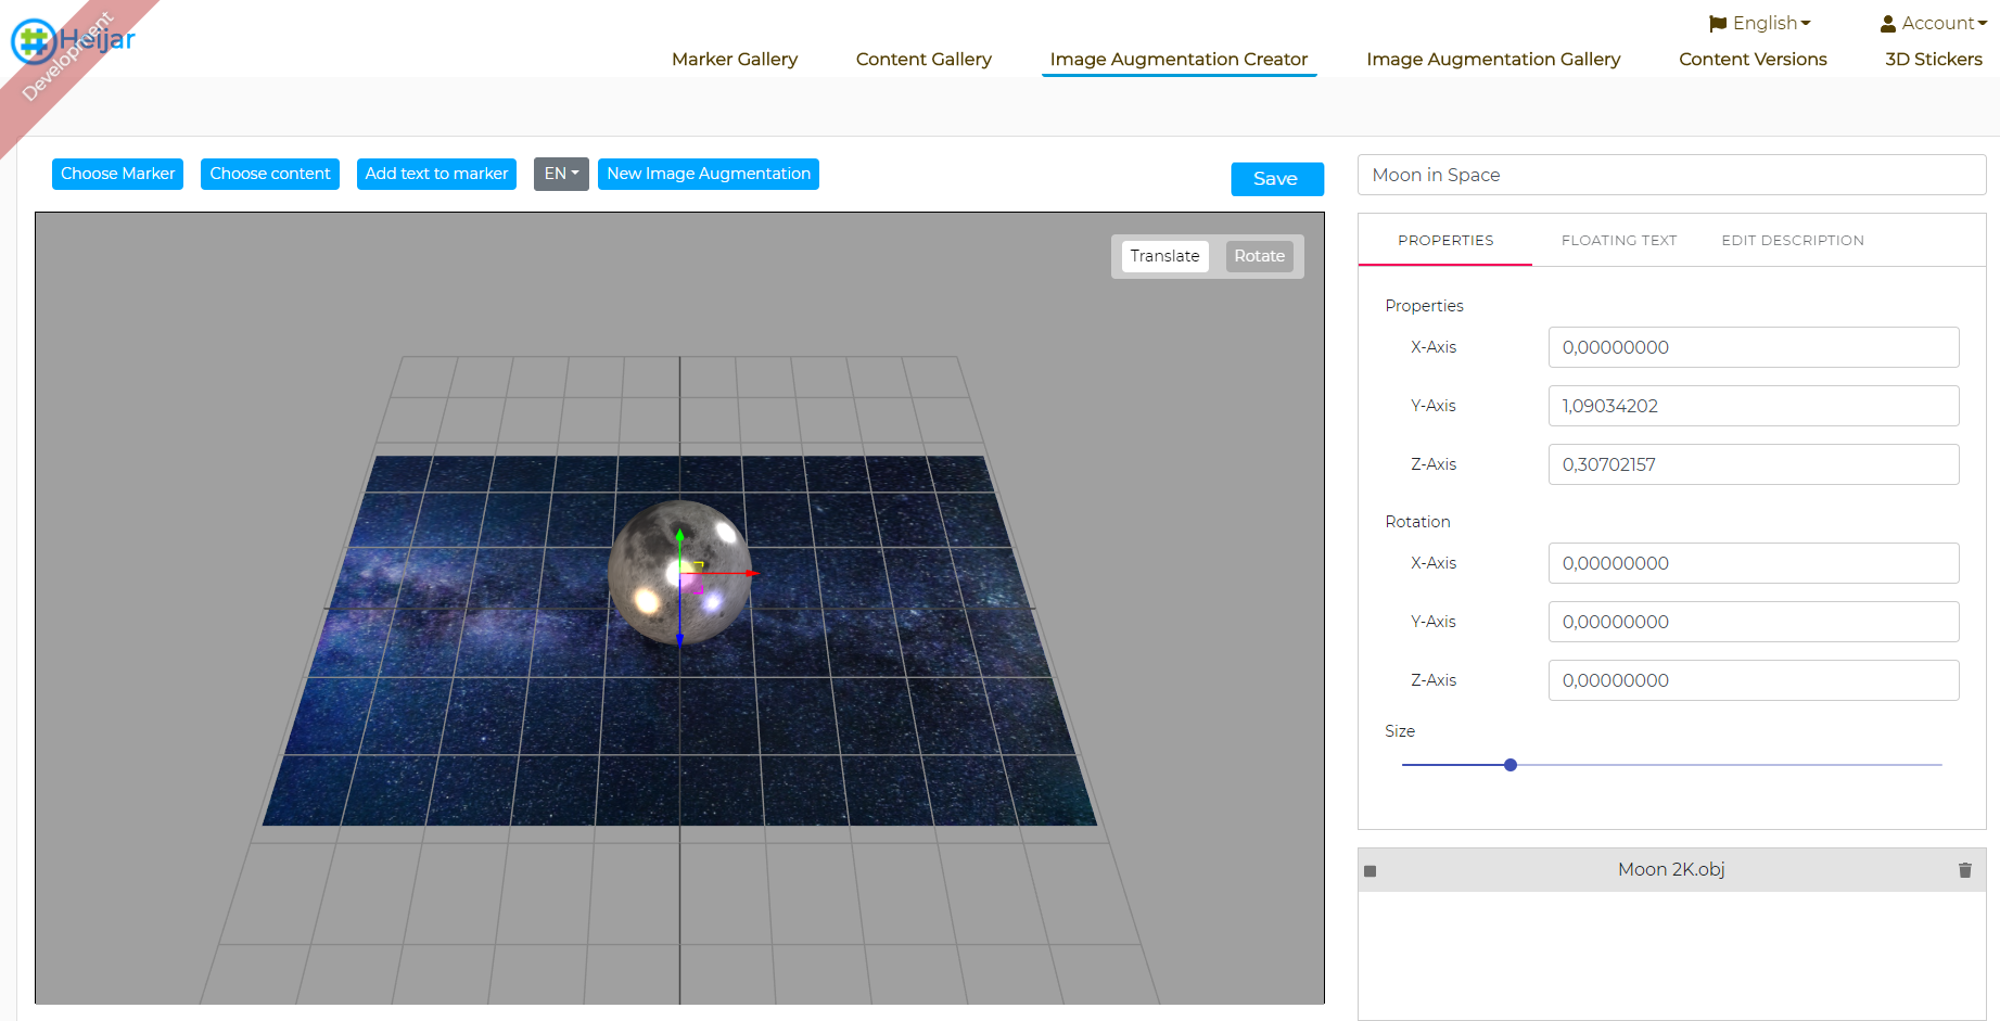
After logging in, go to the Image Augmentation Creator tab
Click on the blue button “Choose Marker” in the left corner of your screen. Select the marker which you want to use. (Confused? – Tutorial 1)
Click on the blue button “Choose Content” next to the previous button. Select the 3D model which you want to use. (Confused? – Tutorial 2)
Let`s get down to business
Step 1: Placing your 3D model

With clicking in the creation space of heijar with your left mouse + drag, you can change your view of the marker and 3D model and see them from different angels. That might be helpful to control where you are placing your model. Use scrolling to zoom in or out.

Make sure that the movement controls are in the origin of the 3D model. If they should jump away, just click on the grey 3D model.obj bar on the right side.
You have 2 movement options for your 3D model which give you full control of your AR experience. You can switch in the right corner of the creation space between “translate” and “rotate”. Use them to place your 3D model where you want to have it in relation to the marker plane and to rotate it to face the correct direction.
Translate: Move the 3D model along x,y,z axis or the planes. Alternatively, you can also type in the wished coordinates for the 3D model origin on the right side. (Not visible here, have a look at the first picture of the post.)
Rotate: Rotate 3D model along the three axis.

Make sure your model is not cut off by the marker plane. This part will not be visible.
Step 2: Sizing your 3D model
The size slider on the right side can be used to control the size of your model. Move the slider to adjust the 3D Model according to your needs.
Step 3: Saving your AR creation
Enter your Image augmentation name in the top right and save your AR experience with the button next to it. With saving, your AR creation is automatically uploaded and is available in the heijar app. But don`t worry, you can still make adjustments! Without knowing the according marker, the AR experience cannot be viewed by your customers.
Trust is good, control is better
Step 4: Checking your AR creation
Go to the marker gallery tab, enlarge the marker you just used, by clicking on it and scrolling. Scan the marker with the heijar app to view your AR creation!!!
Step 5: Editing your AR creation
You can find your saved AR creation in the Augmentation Gallery tab, where all AR creations are listed. Hover over your AR creation and click on “edit”.
Step 6: Making your AR creation available
In order to make your created AR experiences available to your customers, place the markers + according information where you need them. (On request, heijar can also provide you with geolocation based markers or 3D markers.)
Do you also want to know how to create AR experiences with different Content Versions? Check out Tutorial 4 – Creating AR with Content Versions (coming soon).